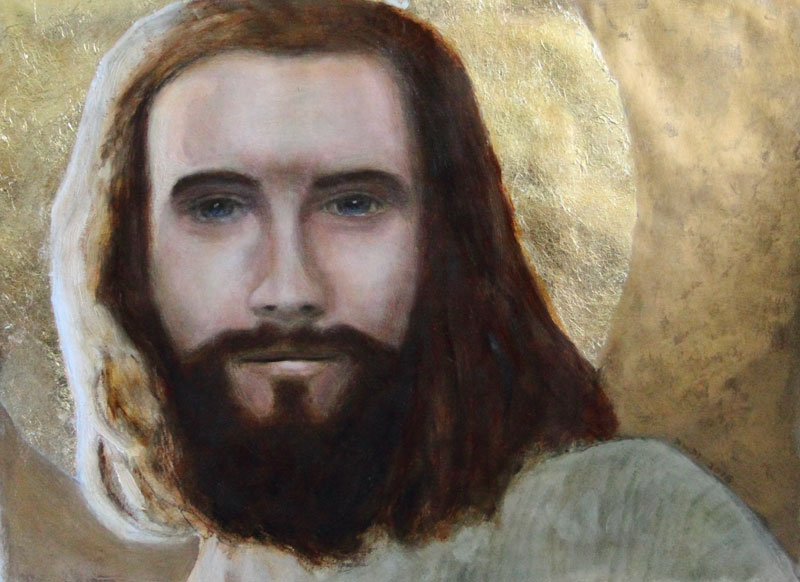

A few years ago my mum asked me to paint Jesus for her, but I only got around to it in 2016. I’m so slack. She expected the traditional Euro Jesus with blue eyes and light skin rather than the more authentic Middle-Eastern type.
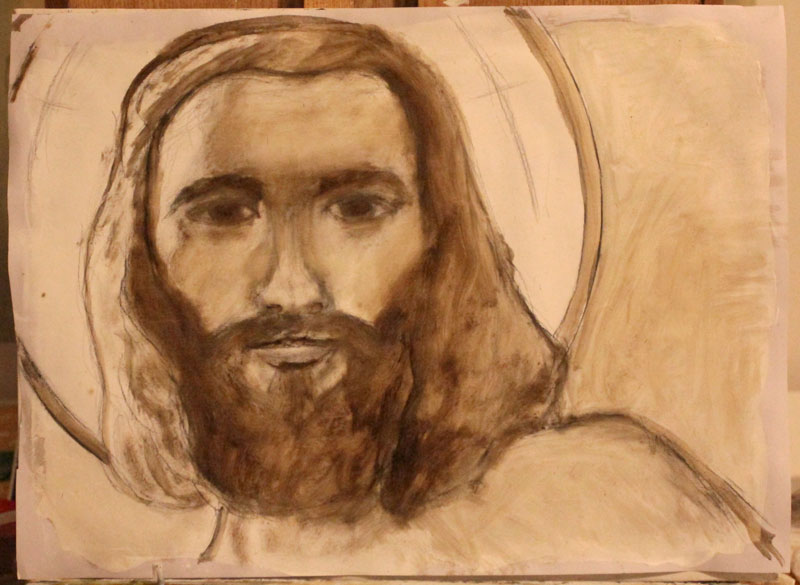
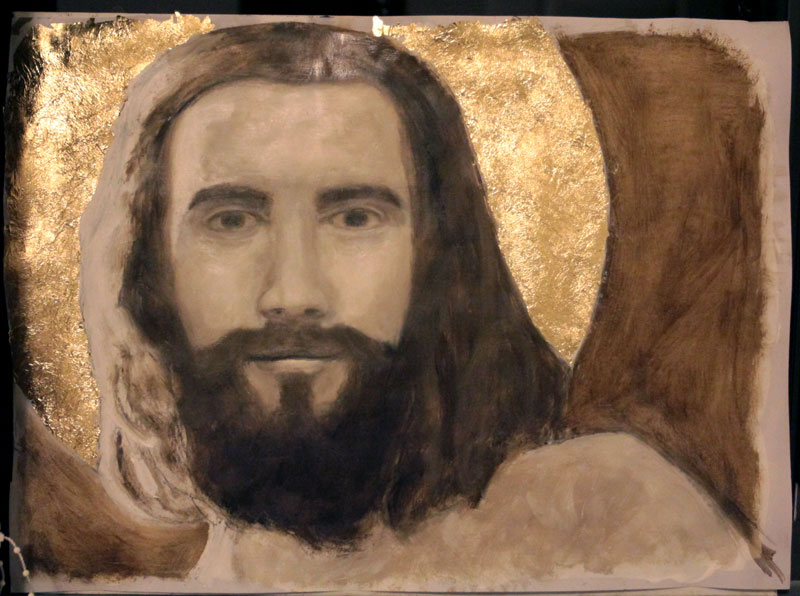
I started off by priming a sheet of A3 sized acid free paper with 3 layers of gesso at the front, and a couple of layers of gesso at the back. After gessoing the paper, I proceeded to create a quick cartoon of Jesus in charcoal. I then used raw umber and turpentine to reinforce the lines and masses. This stage is very much like watercolour painting.
At this stage he looks a bit like an ageing hippy!
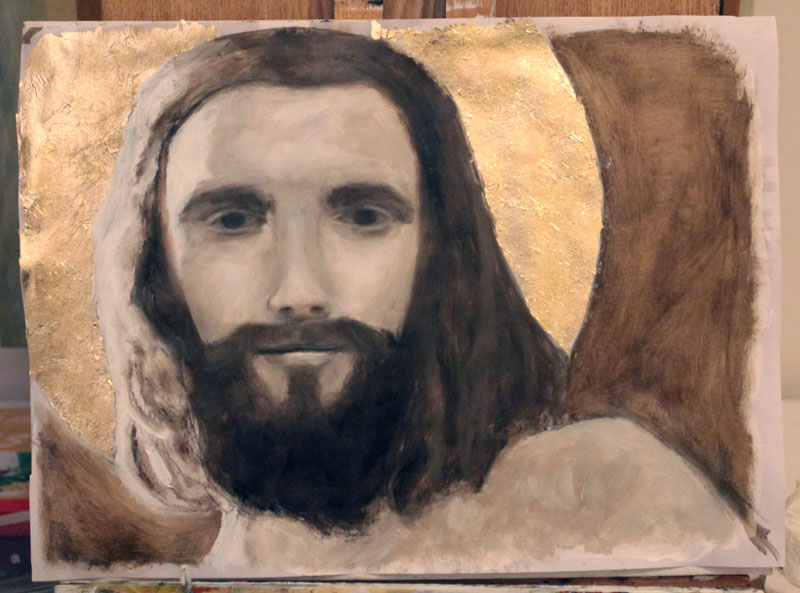
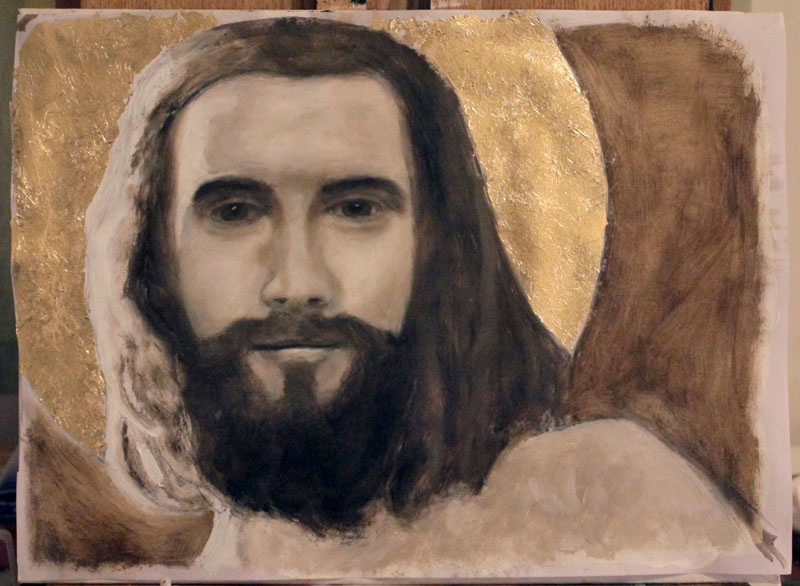
After waiting for the raw umber underpainting to dry, I proceeded to create a greyscale painting using titanium white, raw umber, and ivory black. I mixed 7 or 8 shades ranging from to dark to light: ivory black, pure raw umber, 4 or 5 gradually lightening mixes of raw umber and titanium white, and lastly pure titanium white. Using a separate brush for each shade, I created the following greyscale painting. I only used pure black to reinforce the darkest segments, in particular the line at the mouth, the pupils, nostrils, and a few accents on the beard.
I also laid gold leaf down onto the halo. The halo was initially painted with thick titanium white. I laid the gold leaf onto the wet titanium white halo using tweezers, essentially using the titanium white paint as glue to affix the gold leaf.
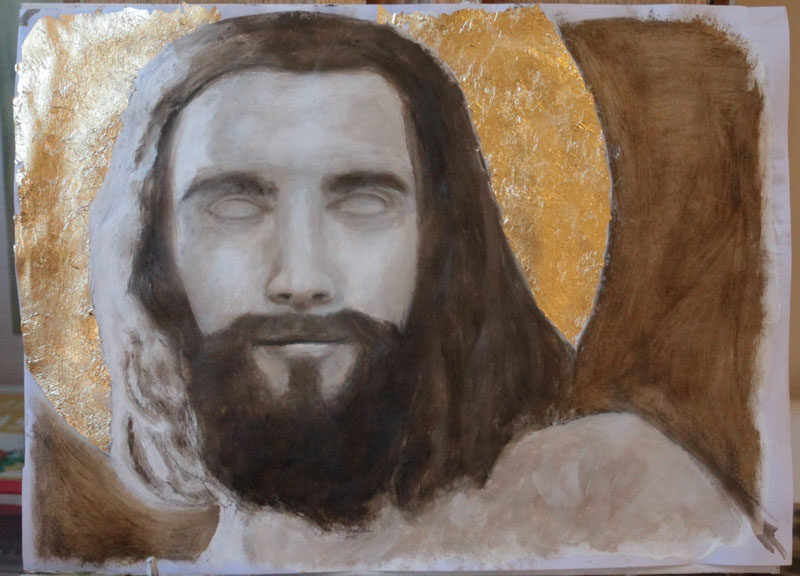
I wasn’t at all happy with the shape of his face at this point. He looks surreal, alienesque, which isn’t a look I was after. Nor was I happy with the shape of the eyes. After waiting for the greyscale layer to dry, I proceeded to reshape the head and eyes to more realistic proportions. I used the same greyscale mixture as in the previous stage. I also whited out the eyes in order to concentrate on them later.
Reshaping the head involved reducing the taper of chin to forehead. I also increased the width and thickness of the nose, and increased the distance between the base of the nose and the upper lip.
I retained the shape of the mouth. My goal with the mouth was to create a barely perceptible ‘Mona Lisa’ smile where the viewer asks themselves “is he smiling or not?”.
He looks pretty creepy at this stage with his eyes milk-white. Time to send it off to my mum! Kidding!
I’m still working with my original greyscale mixture at this stage. I’m trying to focus on getting the forms as close to what I want them to be as possible. After waiting for my previous ‘blind man Pew’ image to dry, I proceed to put more work into the eyes.
I painted in his irises, pupils, and did some more modelling of the shape of the eyelids. I actually spent a long time remodelling the eyes, which involved a lot of wiping back because for some reason I just couldn’t quite get it. It was very, very frustrating, but finally I got the eyes to the shape that I wanted them to be.
I also added some more hair to his moustache, extending it nearer to the base of his nose.
Have you ever seen ‘Star Trek: The Next Generation’? Don’t you think he looks a bit like a bearded, long-haired Data? That’s because his eyes look dead!
At this next stage I’m STILL working in greyscale mode. It’s now time to give his eyes some life, and to add some depth to the forms.
I wait a couple of days for the previous stage to become touch-dry, and proceed to develop the shading of his eyes. Eyeballs are three-dimensional, and it is the shading and highlighting that gives eyes their ‘life’. As you can see from the previous stage, without shading, the eyes appear dead. Great if you want your Jesus to look like an android! Not so great if you want Jesus to look loveable!
I increase the size of his irises, reinforced the outline of the irises, painted in the pupils, and added some modelling to the flesh surrounding his eyes. I also added a highlight to the pupils, and the the segment of flesh just beneath the irises.
I also added some shading to his brow, cheeks, the base of his nose, and lips. The shading above the eyelids helps to create a more endearing look.
 I’m now reasonable happy with the forms and shading, which means that I’ve completed the greyscale stage. It’s just as well, because by this time I’d been working on the painting on and off for a few weeks and was getting pretty bored by it.
The next stage: glazing!
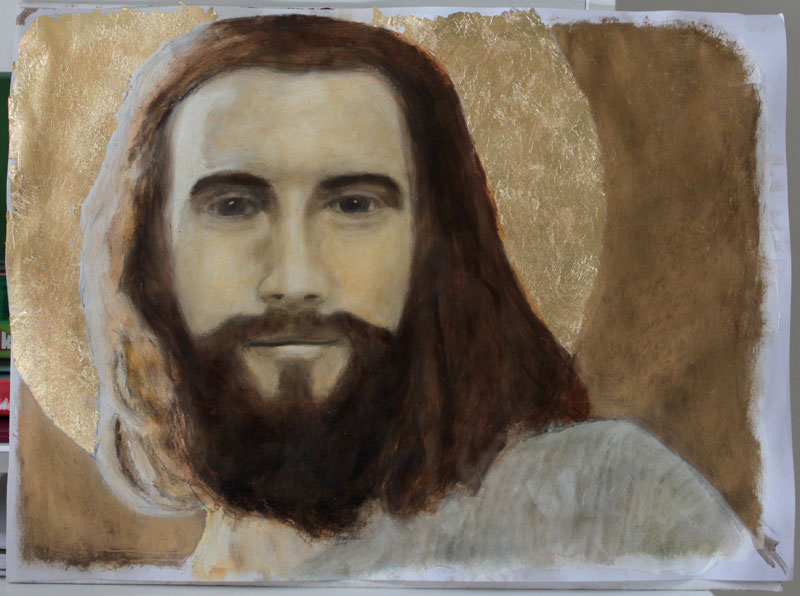
I used a mixture of two-thirds damar varnish and one-third refined linseed oil for my glazing medium. I used a glaze of burnt umber to create a warm tone for his hair. For his flesh I used a glaze of yellow ochre. An initial layer of yellow ochre creates the middle-ground for the subsequent layers of glaze to create a realistic skin-tone.
At the moment he looks like an extra on the Simpsons!
I wait a few days for the yellow layer to dry. I continue to glaze. I use another layer of burnt umber glaze to push the browns of the hair. Also glaze the highlights of the hair with burnt umber, but wipe the glaze back. This has the effect of leaving some umber in the grroves of the thick highlighted white paint, giving it an interesting textured effect.
I use some light red, and glaze over the previous layer of yellow ochre glaze. The light red glaze pushes him to an almost ‘pale white guy in the sun’ appearance.
When glazing skin, you need to make sure to retain the lights. Glazing darkens the image, so after glazing with my desired colour I like to use a transparent white – i this case zinc white – to push forward the light areas. The white will mix with the glaze and you’ll be able to avoid that dark, heavy look.
I also glaze his eyes with ultramarine.
At this next stage, after waiting for the previous stage to dry, I mix some ultramarine and yellow ochre. This counterbalances with the previous stage where I used light red. Green is complementary to red, and so is perfect for creating a shading mix. I use this with a combination of glazing and dry-brushing to reinforce the shadow areas of his flesh. I also reinforce the line of his eyelids with this mixture, as they had lost their definition by the previous stage.
Once again I use burnt umber to push the browns of the hair. I allow the burnt umber glaze to bleed into the gold leaf to create a softer effect.
I also mix a little bit of ultramarine wth zinc white and use it to create the reflections at the base of his irises. This has the effect of making his eyes look ‘watery’ as if he’s about to cry. Hey, it’s Jesus, and he’s just risen from the dead – I’d be crying too if that had happened to me!
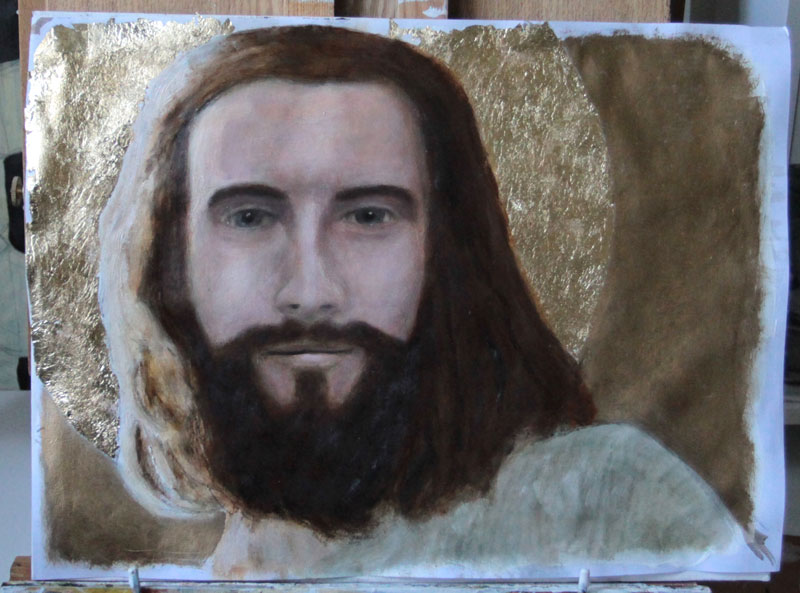
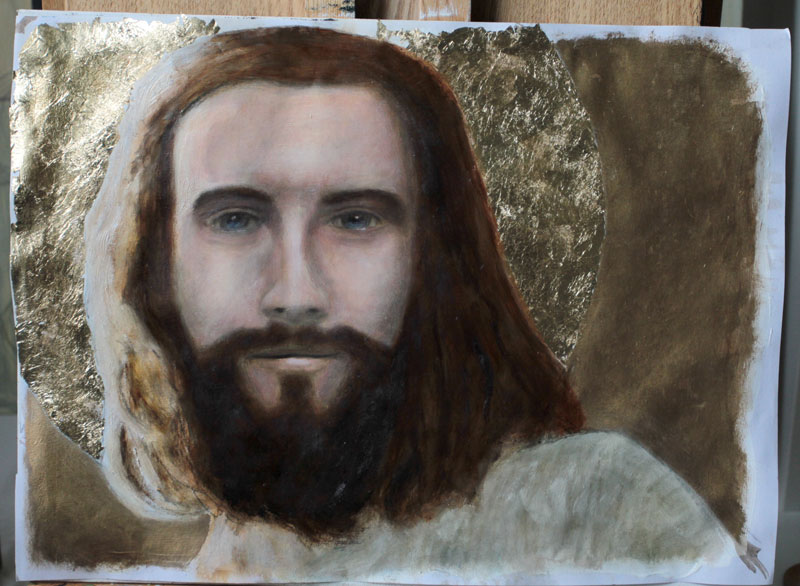 For For now, this is the final stage. I waited a couple of weeks before progressing to this stage. I took a break from this image, and returned to it with fresh eyes.
The shading from the previous stage had made him look a little ashen. Also, one of his eyelids looked a little too bright. I mixed some burnt umber with ultramarine. I then used a tiny amount to dry-brush the ares I felt were too bright.
To fix the ashen appearance, I dry-brushed some light red over the shadow areas of his face and use a finger to rub it all in. I just wanted to create a hint of redness, just enough to warm p his appearance a tad.
I used some more zinc white blended into the image with a finger to reinforce the lighter areas of his flesh.
Finally, I reinforced the highlights of his hair.
So for now, this is the finished painting. I’m so over this image – I’ve spent two months on it. I’m sick of t now! There’s a lot I’m not happy with – the shadow on his brow, the shape of the eyes, the hairline, but I can’t bear the sight of this picture anymore. Time to get it framed and send it to my mum!